This post covers an overview of the AWS Free Tier account. Amazon Web Services (AWS) offers 12 months of free tier access to new users so they can get hands-on experience with AWS cloud services.
The AWS Free Tier includes a number of different services with usage limits, allowing you to practice and learn about AWS Cloud as well as use it for regular business purposes. The free tier is designed to give customers hands-on experience with AWS Cloud services free of cost for one year. All services come with specific usage limits beyond which you will be charged.
Register for AWS Free Tier Account
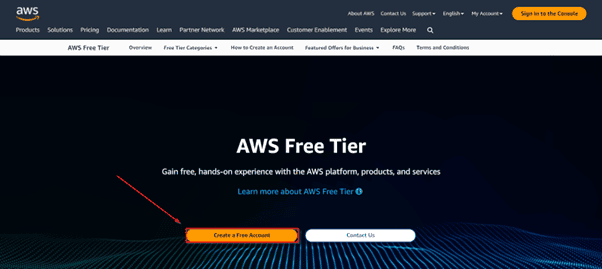
Step 1: Open your web browser and navigate to the AWS Free Tier Page.
Step 2: Click on Create a Free Account in the middle of the page.
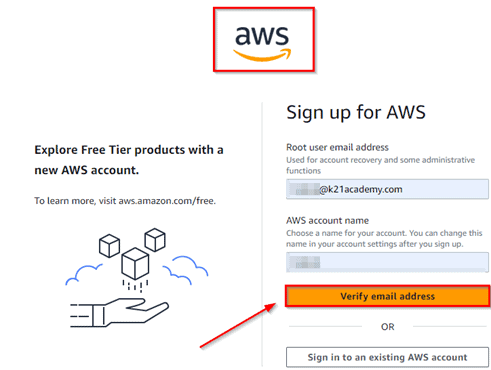
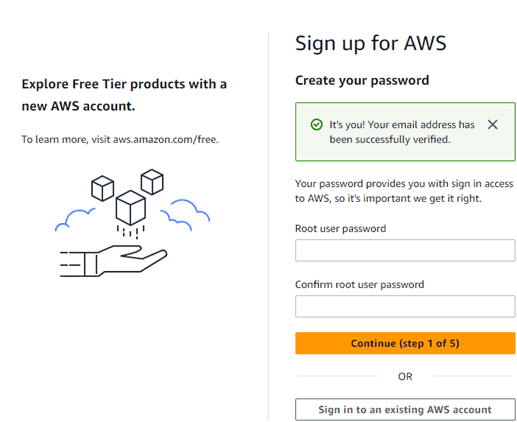
Step 3: Verify your email address.
Provide details for your AWS login and click Continue.
- Email address: Use an email that’s not registered with AWS yet
- Password: Choose a password
- Confirm password: Confirm the password
- Captcha: Enter the security check
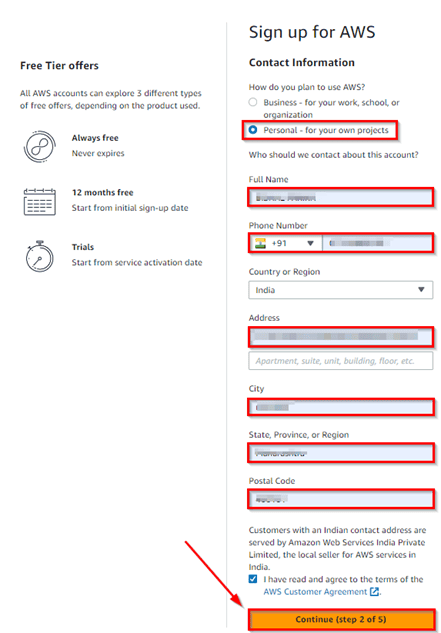
Step 4: Contact Information
Select the account type (Professional or Personal). If you’re creating a personal account, select Personal Account, otherwise choose Company Account. Fill in the details correctly, accept the terms and conditions, then click Create Account and Continue.
Note: Provide accurate contact details and mobile number for verification.
Step 5: Payment & PAN Information
Enter your credit/debit card details and billing address, then click Secure Submit.
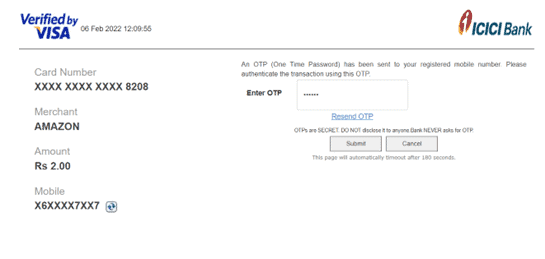
Step 6: Payment verification
You will be redirected to the payment gateway to verify your card. For example, in India, AWS charges a minimal 2 INR for verification.

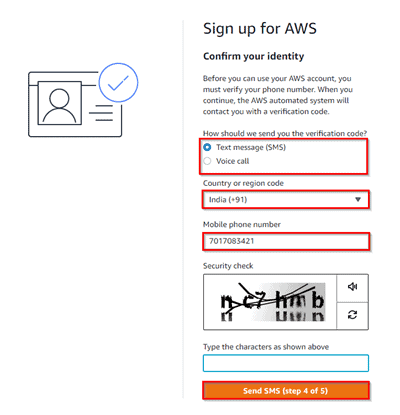
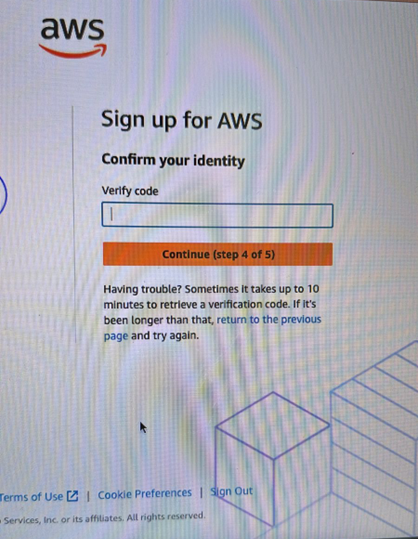
Step 7: Phone verification
You will be taken to an identity verification page with your phone number pre-filled. Choose either Text message or Voice call, solve the captcha, then click Send SMS or Call Me Now.
Step 8: Enter the verification code you receive via SMS or voice call and click Verify Code.
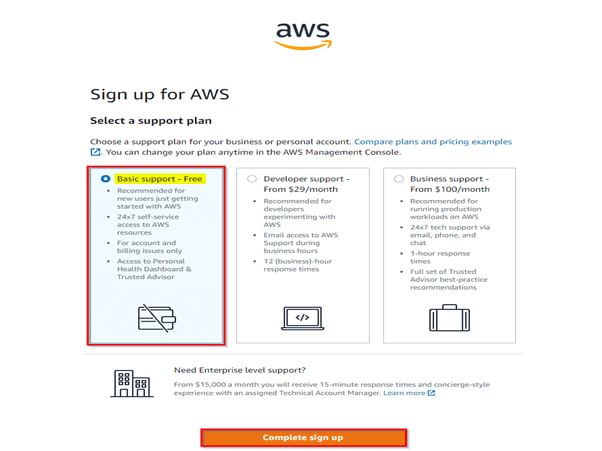
Step 9: Support Plan
Choose your suitable AWS support plan and click Continue.

Note: All accounts come with free basic support by default.
Step 10: Registration Confirmation
After completing all steps, you’ll see a confirmation page. Your account activation may take 30 minutes to 1 hour, after which you’ll receive an activation email.
Login to AWS Console
Note: Log in as the Root user.
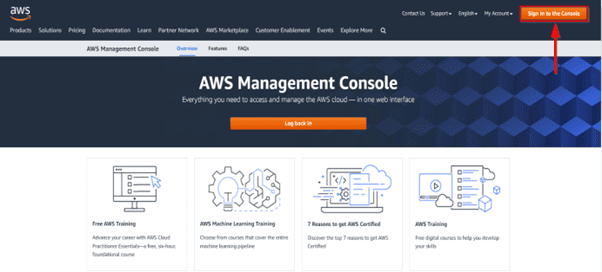
Step 1: Open your browser and go to https://aws.amazon.com/console/. Click Sign in to the console.

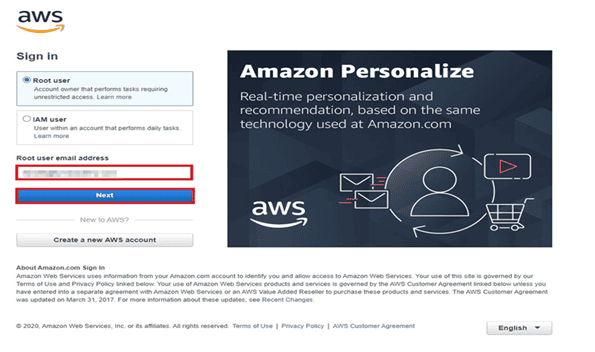
Step 2: Enter your email and click Next.
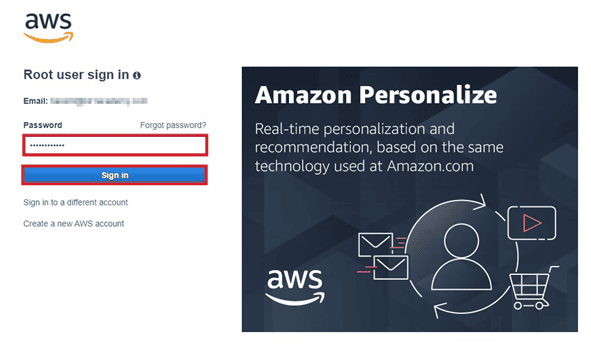
Step 3: Enter your password and click Sign in.
Step 4: You’ll see the AWS Console home screen.
Add MFA (Multi-Factor Authentication)
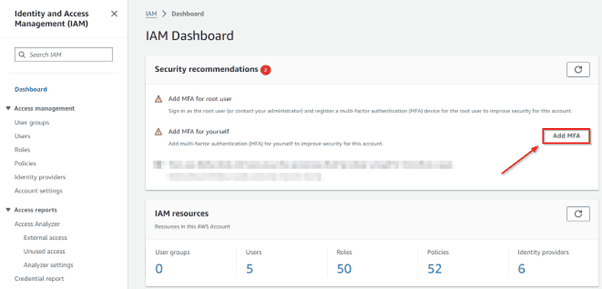
Step 1: Navigate to the IAM service in AWS Console.
Step 2: Click the Add MFA button.

Step 3: Enter a device name, select Authenticator app, then click Next.
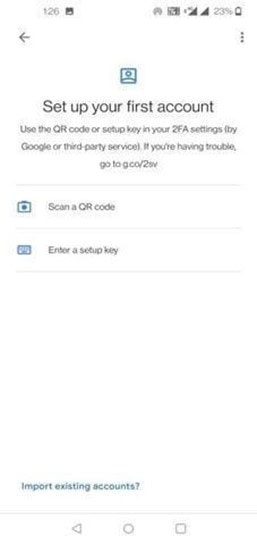
Step 4: Install Google Authenticator on your phone:
Step 5: Open the Google Authenticator app, tap Get Started, and scan the QR code shown in AWS Console.
Step 6: Enter the two MFA codes generated by your phone app into the AWS Console and click Add MFA.
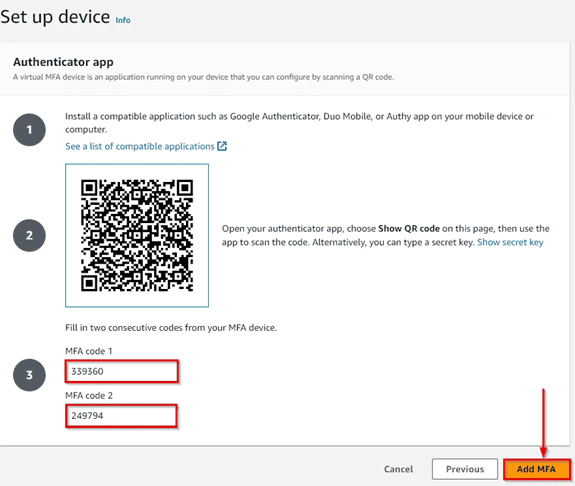
Note: Take a screenshot of the QR code to re-enable MFA if you lose your phone.
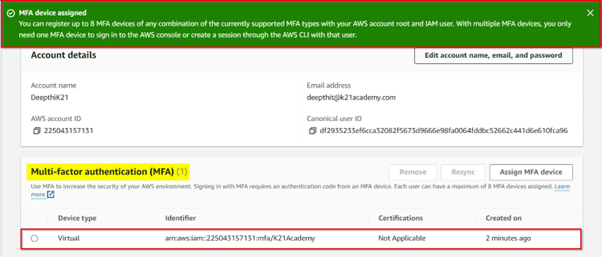
Step 7: Your MFA device will now be added.
Access AWS Console Using MFA
Step 1: Go to the AWS login page, select Root User, and enter your email.

Step 2: Enter your password.

Step 3: Use your Google Authenticator app to get the MFA code and enter it into the console.

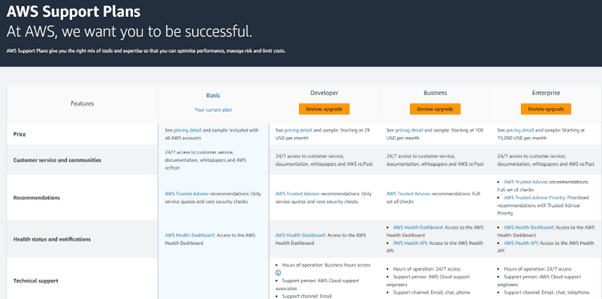
Verify Your Support Plan
AWS offers four support plans: Basic, Developer, Business, and Enterprise. By default, your account is on Basic. You can change your plan anytime.
Check your plan here:
https://console.aws.amazon.com/support/plans/home#/
AWS Free Tier Limits
- 750 hours monthly of Amazon EC2 (virtual server)
- 5 GB of Amazon S3 (object storage)
- 750 hours of Amazon RDS (relational database services) monthly
- 5 GB of Amazon EFS (file storage)
- 30 GB of Amazon Elastic Block Store (EBS) SSD or magnetic storage
Troubleshooting
1. Didn’t receive OTP on your mobile?
Cause: Incorrect phone number, country code, or AWS server issue.
Fix:
- Double-check your phone number and country code.
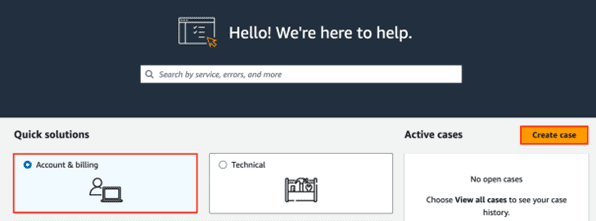
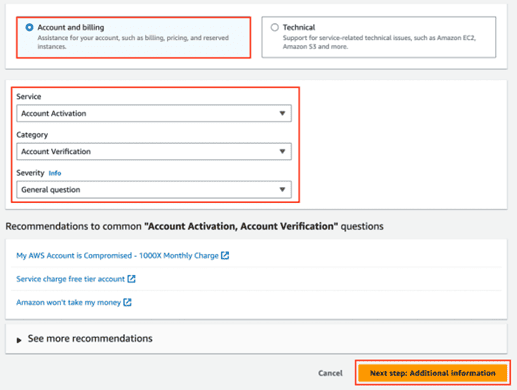
- If correct but still no OTP, contact AWS Support by creating a case here:
https://support.console.aws.amazon.com/support/home?region=us-east-1#/
2. AWS Account on Hold
Cause: Payment problems, additional verification needed, or security issues.
Fix:
- Check your payment method.
- Follow instructions from AWS emails.
- Contact AWS Support if needed.
3. “Failed to operate: DescribeAvailabilityZones” error
Cause: Incorrect system time or network issues.
Fix:
- Set your computer’s date and time correctly, preferably automatic time setting.
Related Links / References
- AWS Free Tier Services
- AWS Console Guide
- AWS Certified Solutions Architect Associate Exam
- AWS Elastic File System Documentation
- AWS DevOps Engineer Certification
Next Step
You have successfully created your AWS Free Tier Account! Start exploring AWS services and build your cloud skills.